Contents
Greetings dear readers,
In this blog post, we’re going to build the active directory infrastructure needed to build out our PKI. In part 1, we went over some theory and background information. It’s not necessary to read that post to continue on, however since understanding the fundamentals of how PKI works is an objective of the series, I recommend it.
If you’re already familiar with active directory administration you can check out the lab info for the build and set it up. For everyone else I’ve stepped through setting up our domain controller and joining a workstation to the domain.
This was supposed to be a three part series, but the AD setup resulted in a fairly sizable post on it’s own. So this now a four part series. 🙂
Table of contents:
- Lab Hardware
- Lab Topology
- Active Directory Domain Services
- DHCP
- Join workstation to domain
Lab Hardware, operating systems used:
This lab is being run on an Intel NUC running VMWare ESXi 6. It has 32gb of ram and a 500gb m.2 SSD

These little guys are great. They’re silent, fast, portable, and use very little power. If you want to build one for yourself, here’s the parts list on Amazon:
https://www.amazon.com/gp/registry/wishlist/A65HYLGFKYSZ
As of this writing, the build cost is approx. $635.00
ESXi is a free download from vmware.com. If you want to run vcenter (which is very nice to have), you can either download the evaluation version, or join VMUG Advantage. VMUG Advantage is $200.00 a year and you get a pretty impressive list of toys to play with for the money. If you’re labbing at home a lot and want to run more than one ESXi host, I think it’s a good deal. That can be found at https://www.vmug.com/Advantage/.
The windows VMs were spun up using Windows 2012r2 for the servers and Windows 10 Enterprise for the management station. You can download evaluation versions of these images from https://www.microsoft.com/en-us/evalcenter/.
Lab Topology:

Lab topology
Here’s the list of the machines, and what functions they’re going to serve:
- dc01: active directory domain controller, DNS, DHCP
- pki01: standalone root CA. Not domain joined
- pki02: enterprise issuing CA. website for hosting CDP and AIA. Network device enrollment service.
- nps01: network policy server. This will function as a radius server.
- pc01: management station.
The domain should have two OUs created:
- Densemode users
- Densemode computers
In the densemode users ou, create an account called user1 with a password of Pass123.
The administrator password on all machines will be Pass123.
The steps to set everything up follow, so don’t worry if you’re sure what do to.
Setting up Active Directory Domain Services (ADDS)
Prior to setting up ADDS, please ensure the dc01 machine has the following settings applied:
- Computer Name: dc01
- IP address: 10.1.1.201
- Network mask: 255.255.255.0
- Default gateway: 10.1.1.1
- DNS Server 10.1.1.201
These items can be verified and configured from the local server pane of Server Manager:


Once that’s done, we’re ready to configure ADDS and DHCP.
With the local server selected, click manage, Add roles and features.

Click Server Selection:

Click Server Roles, select Active Directory Domain Services:

Make sure ‘include management tools’ is selected, and click add features:

Click Confirmation, then Install :
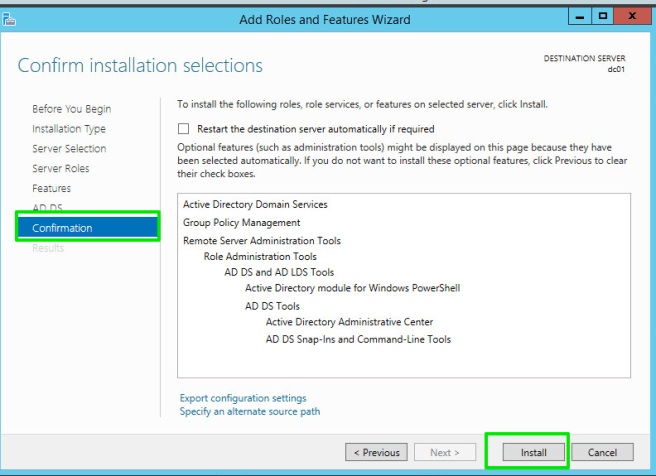
When the ADDS role has been installed, the screen will look like this:

Note the text under the installation progress bar. Click Close.
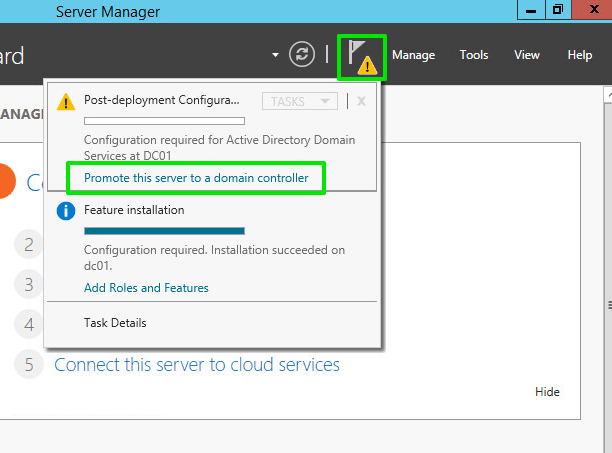
Server Manager will now have a Yellow Triangle in the notification area. Click on the flag and click ‘promote this serve to a domain controller’
At the deployment configuration screen, select ‘add a new forest’, and type in a root domain name. Then click next:

At the Domain Controller Options scree, enter a Directory Services Restore Mode (DSRM) password. My suggestion for labbing purposes is to use Pass123. Then click Next:

You’ll see a warning on the DNS options screen that can be safely ignored. Click Next:

Accept the NetBIOS domain name, and click Next:

On the Paths screen click next:

On the review options screen, click Next:

On the Prerequisites check screen, you’ll see some yellow triangles. They’re informational in nature. Go ahead and click install:

Once the installation is complete the machine will reboot. This is normal. Go ahead and log back in once windows has restarted. Server manager should launch automatically. If it doesn’t go ahead and launch it by clicking on it’s pinned icon on the task bar.
Let’s verify that our domain controller is functioning correctly.
From Server Manager click Tools, Active Directory Users and Computers (ADUC):

Right click on the domain object, click New, Organizational Unit.

Type in densemode users. if you used a different domain name, go ahead and substitute densemode with the name you used. Then click Ok:

Click on the right facing triangle to the left of the domain object to expand the list of containers. You should see the OU you created. Right click on it, and click new, user:

Fill in the first name, last name, and user logon name, then click next:

Use Pass123 as the password. Uncheck ‘user must change password at next logon’, check ‘password next expires’. NOTE: You would never want to disable password expiration on a live network. This is for labbing purposes only:

Click Finish:

PRACTICE: Create an OU in your domain called ‘densemode computers’. If you used a different domain name, use the one you created. Then right click on the domain node and click refresh. When you are done, you should have <domain> users and <domain> computers OUs next to each other like this:

As we move through later tasks, we’ll be making use of these containers. This is a good time to point out that in Active Directory it’s always a good idea to use your own OUs for user and computer objects rather than the default users and computers OUs. The reasons for this will become clearer later on when we get to using group policy objects.
Additionally, by creating these objects, we’ve verified that our domain controller is working.
Setting up DHCP
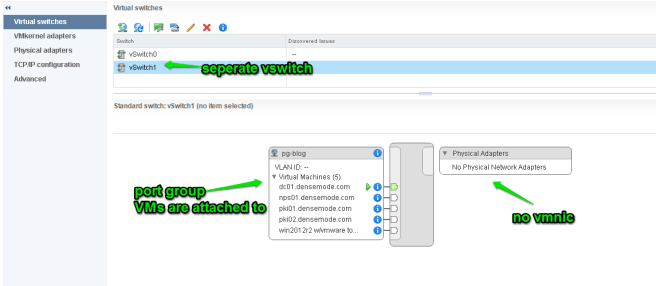
Another infrastructure service we’re going to want in our test environment is DHCP. This will make it easy to add additional client devices. It’s pretty easy to set up, just make sure not to run it on your actual home network. Ideally you should run it on an isolated network. In my lab, I’m a using vswitch that’s not backed by physical nic:
Let’s get started.
In Server Manager on dc01, click Manage, Add roles and Features
Click Server Selection:
Now click Server Roles, DHCP Server:

Select add features:

Select Confirmation, Restart the destination server if required, and click yes:

Click Install:

When installation is complete you will see the Configuration required/Installation Succeeded message. Click Close:

Click the notification flag, then select Complete DHCP configuration:

Click Next:

Click commit to authorize the DHCP server service in AD:

Click Close:

Setting up the DHCP Scope
In server manager select tools, DHCP:

In DHCP manager expand the server node, right click on ipv4, and select New Scope:

Click next to begin the New Scope Wizard:

For the name enter “subnet 1”, then click next:

On the ip address range screen, enter a range of 10.1.1.50 to 10.1.1.99, with a subnet mask of 255.255.255.0. Click next:

On the exclusions and delay screen, click next:

Change the lease duration to 8 hours. Click next:

Select “yes I want to configure these options now”. Click next:

For the router, enter 10.1.1.1, click add. Then click Next:

The DNS screen should pre-populated with the DNS suffix and DNS server. The DNS server should be 10.1.1.201. Verify the settings and click next:

Leave WINS servers blank. Click Next:

Select “yes I want to activate this scope now”. Click Next:
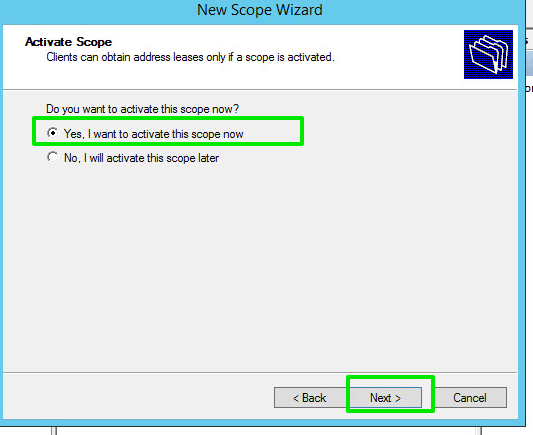
Click Finish:

Verify DHCP and join workstation to the domain
Now we’re going to verify DHCP by connecting our management station to the lab network and joining it to the domain. This should be a clean installation of windows 10 in a virtual machine with vmware tools installed.
In the Cortana bar, type control panel and hit enter:

Click the drop down next to view by: and select small icons:

Double click on System:

To the right of Computer name, domain, and workgroup settings click “change settings”

Click Network ID:

Select “this computer is part of a business network…” Click Next:

Select “my company has a network with a domain”. click Next:

On the information screen click next.
On the “Type your user name, password, and domain name, enter:
- User: administrator
- Password: Pass123
- Domain: densemode.com
Click Next:

On the type computer name and computer domain name screen, enter
- Computer Name: pc01
- Computer Domain: densemode.com
In the enter domain user name and password screen enter the following:
- User: administrator
- Password: Pass123
- Domain: densemode.com
Click OK:

If everything is working, you will be advised that you’ll need to restart your computer. Click finish.
After complete the wizard, you will be place back at the system properties screen. Click ok.
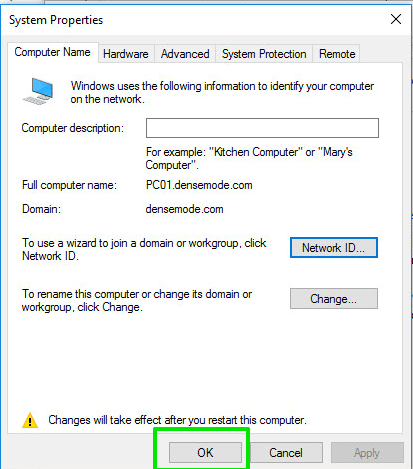
Click Restart Now:

After the computer restarts, Select other user at the logon screen:

Log on using the account we created in the active directory domain services exercise:
(logon, password) user1/Pass123

If you’re able to log on Congratulations! You’ve built your basic infrastructure and We’re ready to start installing Active Directory Certificate Services.
In the next post, we’ll install Active Directory Certificate Services.